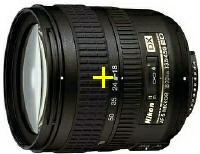
Nikon 18-70mm lens
|
Panoramic Pivot Point
Next Article >>
Panoramic Pivot Point Defined: The rotational point at which the
alignment of all objects seen through the lens stays the same, even as
the lens+camera is rotated on a tripod.
|
NOTE: The proper pivot point is not the lens "nodal point" (stated elsewhere
on the Internet), but rather the center of the lens
Entrance Pupil.,
For details, check out
this detailed paper
on the subject. Rather than get hung up on the proper name (or not) for this
pivot point, let's just call it the 'Panoramic Pivot Point'.
|
|
For example, when taking pictures for stitching a panorama, you want all
objects from one picture to another picture to have the same alignment, which means
you must rotate your camera+lens about the lens pano pivot point. You accomplish
this by positioning the lens pano pivot point directly over the tripod rotational
point.
The best way to clearly understand the importance of the pano pivot point
concept is to examine how quickly objects can become misaligned (parallax) when
the lens pano pivot point is not aligned over the tripod rotational point.
Figure 1: Pano pivot point, in blue, ahead of tripod
rotation point, in red -- misaligned objects
|
Parallax Problem: Refer to Figure 1 (right), where the pano pivot point
of the lens (blue X) is located in front of the tripod rotation point
(red X). When the camera and lens is rotated left and right (on tripod
rotation point), two of the objects
seen through the lens (black dots) do not stay aligned.
This situation is very typical when you directly mount a camera onto a tripod,
because the tripod mounting hole is under the camera, but the pano pivot
point of the lens is over the lens somewhere -- well ahead of the tripod mounting
hole and rotational point.
You can use your own body to clearly illustrate the parallax problem without having
to set up a camera and tripod. Consider your head as a camera body,
one eye as the lens and pano pivot point (blue X), and your neck/spine as the
tripod rotational point (red X).
Close one eye and look directly at the corner of the room you are in. Hold your
arm out, make a fist and point your thumb up (closest black dot), and align it with
the corner of the room (furthest black dot). Now rotate your head to the left --
just like the leftmost image in Figure 1, your thumb and the corner of the room are
no longer aligned. Likewise, when you rotate your head to the right, your thumb
and the corner of the room are no longer aligned, like the rightmost image in Figure 1.

Figure 2: Pano pivot point, in blue, aligned with tripod
rotation point, in red -- aligned objects
|
Proper Pano Pivot Point: Refer to Figure 2 to the right, where
the pano pivot point of the lens (blue X) is perfectly aligned over the
tripod rotation point (red X).
Please note that your camera is no longer
mounted directly to the tripod, but to brackets and sliders, which in turn
connect to the tripod. The various brackets and sliders allow you to
change the position of the camera relative to the tripod and perfectly align
the lens pano pivot point over the tripod rotational point.
The result is that no matter how the camera is rotated left/right, objects
seen through the lens stay in perfect alignment.
So how do you find this pano pivot point?
Finding the pano pivot point: To find the pano pivot point for your camera lens,
first configure your camera and lens exactly as you intend to use it (focal length,
focus distance, aperture, etc). Because with many lenses, the pano pivot point changes
position as lens settings change. Next, you will need the appropriate brackets
and sliders that allow you to adjust your camera position, even after it is mounted
to a tripod. For example, here is one possible solution from
www.reallyrightstuff.com:
Tripod |
|
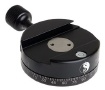
Panning clamp |
|
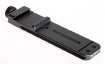
Rail |
|
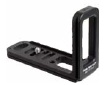
Camera braket |
Then, to find the pano pivot point for your camera lens, select two reference objects,
one close to the lens (2-3 feet), and one far away (20+ feet), like seen in
Figure 2 above. Then, look through your viewfinder and rotate the camera
left/right. If there is a misalignment, you will see the Figure 1 situation.
Adjust the camera position relative to the tripod until the
two reference objects stay aligned as the camera rotates, like Figure 2.
Finally, fine-tune the camera position. Take pictures with the camera pointed
left/center/right and view the resulting pictures on your computer. This final
step is recommended because the pictures taken reveal more detail then the camera
viewfinder. Make any final adjustments to properly align the reference objects.
Your lens pano pivot point is now directly over the tripod rotational point, and you have
found the pano pivot point of your lens (for the focal length, etc that you have configured).
A word of caution: Please note that the pano pivot point will likely change position
when you change the focal length or focus distance of your lens. Namely, the pano pivot point
for an 18-70mm lens in the 18mm position will likely not be the pano pivot point for
the lens in the 70mm positions. Nor will the pivot point be the same for the lens focused
at 5 feet vs infinity.
Computing the location of the Panoramic Pivot Point: An alternative is to
compute where the Panoramic Pivot Point is by calculating
the FOV of your lens, a side effect of which is finding the Entrance Pupil
for your lens.
|
